


 My second experiment with plaster dealt with using carving tools to forge a shape out of a small block of plaster, and seeing what kind of detail i could get and keep on the surface of the plaster. This worked out really well and was actually surprisingly easy. The plaster is alot easier to shape when there is still moisture left from the mold, as time goes on and the moisture dries out, the plaster is more likely to crumble. I would say if you wanted to carve something, do it sooner than later after it comes out of the mold, as the moisture definitely makes it easier.


 d finish on it.


 As you can see it's a little more difficult to play both instruments at once because of the way they are angled and on top of that I'm losing a lot of desk space. My rack will eliminate both of these problems.
So today I started making the rack with making some cuts on the chop saw and doing some welding and grinding to make the joints. Here is my rack so far: It's a little hard to see but bsically it has 1" square tubing in the shape of 'C's on both sides and two .5" tubing running the length of the rack where the instrument will sit. I also made two little stoppers by bending sheet metal and welding it to the rack. These will hold the instrument in place since my rack is angled downwards. It is hemmed at the top so it doesn't cut my wrist when playing:
Weds. I will be bringing in my digital piano stand to do some drilling for bolts that will attach the rack to the stand.




 My uncle said that cherry was denser and might work with the glue I was using. When I tried it, it did work very well, except that it cracked only at the seam where it had been matched in the factory. But it took to the shape very well. I found that applying a great deal of steam with the paper towel between the iron and the veneer allowed for much tighter angles than without.

 For the third experiment I tried wrapping a differnt kind of burl that I could not identify around the same shape. It pretty much worked the same way, was a little harder to get around angles but that may be because the piece was thicker than the cherry.
 Trimming the sides with an exacto knife does not look as nice as sanding them down to the MDF.
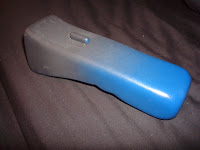
 I wanted to see if the veneer would stick to plastic, so I tried wrapping it around a high heel. I sanded the heel with 80 grit first. It cracked a lot because of the severe shape, but it stuck very well to the plastic. You just have to hold the iron on each section long enough to really heat the glue.
 I also combined fabric and veneer.
 Then I had a piece laser cut, which worked pretty well.

