I started the lamp by making patterns and a mock up out of brown paper, which I measured in order to sculpt the base out of MDF.

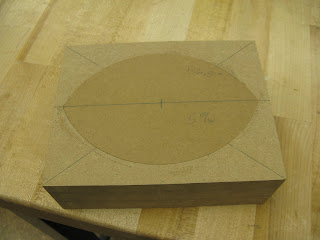
 From those measurements, I made new patterns for the base, one slightly larger than the other so that the base would taper slightly. Then I made a rectangle from three layers of MDF and centered the patterns on it. I then shaped the base on various machines according to the patterns, which was more time consuming and difficult than I expected. When it was finished, I drilled the holes for the lamp components to go through.

 After that, I realized that a curve on the surface of the base would create a nice wave shaped shadow when the light came through the veneer, so I drew the line I wanted on the pattern and traced it onto the base with a pattern tracing wheel.


Then I added a layer of MDF and shaped it again, and sanded in the curve. The hole for the light socket had to be re-drilled through the added layer.

 From those measurements, I made new patterns for the base, one slightly larger than the other so that the base would taper slightly. Then I made a rectangle from three layers of MDF and centered the patterns on it. I then shaped the base on various machines according to the patterns, which was more time consuming and difficult than I expected. When it was finished, I drilled the holes for the lamp components to go through.
 After that, I realized that a curve on the surface of the base would create a nice wave shaped shadow when the light came through the veneer, so I drew the line I wanted on the pattern and traced it onto the base with a pattern tracing wheel.

Then I added a layer of MDF and shaped it again, and sanded in the curve. The hole for the light socket had to be re-drilled through the added layer.


